This article describes the settings of the Freezvon SIP trunk: Adding SIP trunk to FreePBX, configuring outbound and inbound routing, adding a dial pattern based on a match.
Steps to add the Freezvon SIP trunk:
- Adding the SIP trunk to FreePBX;
- Adding extension;
- Adding outbound routing, adding/changing trunk dial patterns;
- Adding inbound routing.
First, enable SRV Lookup by going to Settings -> Asterisk SIP Settings -> Chan SIP Settings, and for the value parameter Enable SRV Lookup, choose an option Yes/Enabled.
Adding SIP trunk to FreePBX
After receiving the personal settings of your SIP number and password from Freezvon, you can go forward with configuring the trunk. For this, in FreePBX, go to Connectivity -> Trunks -> Add SIP (chan_sip) trunk.
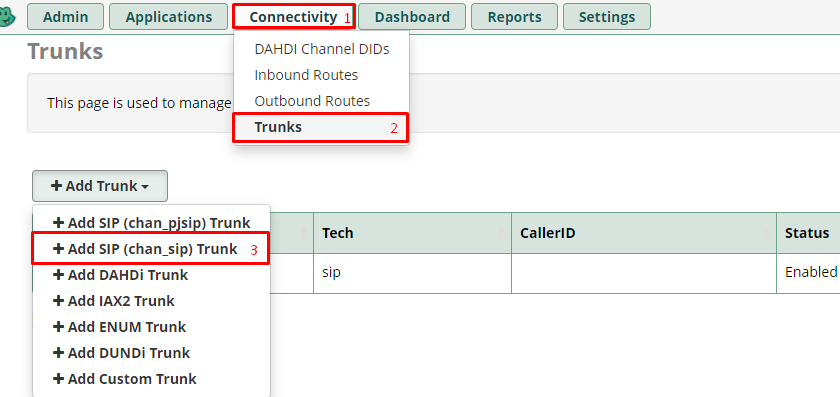
Connect the FreePBX trunk
After adding any name of your choosing, for example, "freezvon_trunk", for more security, we add a limit for simultaneous channels, going to the "SIP Settings" tab and input the following entries:
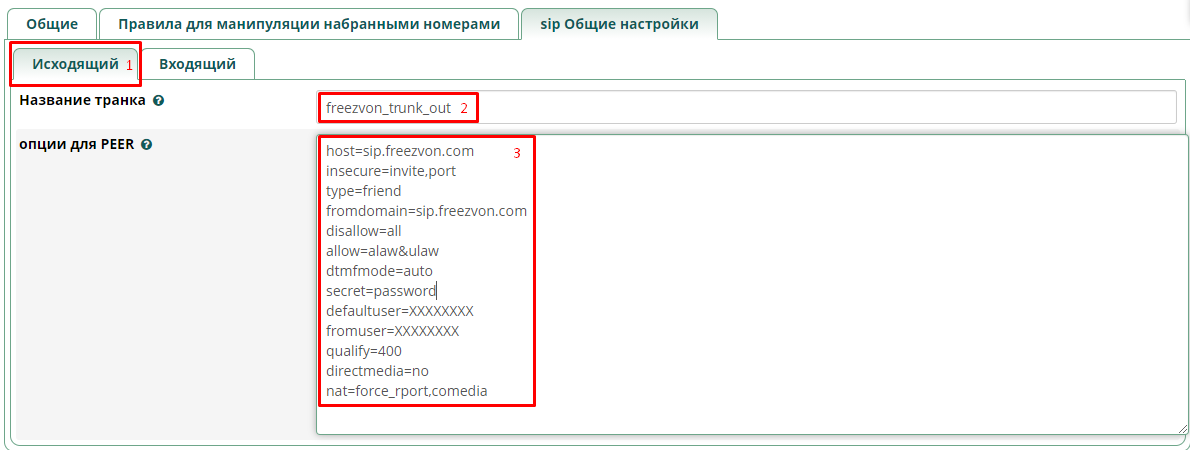
Connect the FreePBX trunk
host=sip.freezvon.com
insecure=invite,port
type=friend
fromdomain=sip.freezvon.com
disallow=all
allow=alaw&ulaw
dtmfmode=auto
secret=password
defaultuser=XXXXXXXX
fromuser=XXXXXXXX
qualify=400
directmedia=no
nat=force_rport,comedia
Below, you can find out more about each value parameter:
- defaultuser, fromuser: The SIP number you received from Freezvon
- secret: SIP password
- host: sip.freezvon.com: domain to connect to Freezvon
- qualify: time interval (in ms) between pinging the host
- disallow, allow: commands to configure allowed codecs
- directmedia: responsible for RTP function (voice, media data)
- dtmfmode: DTMF mode (rfc2833 or auto)
- nat: in case if traffic goes through nat, the required settings are force_rport, comedia. In another case — nat=no
Let’s move on to the Incoming configuration
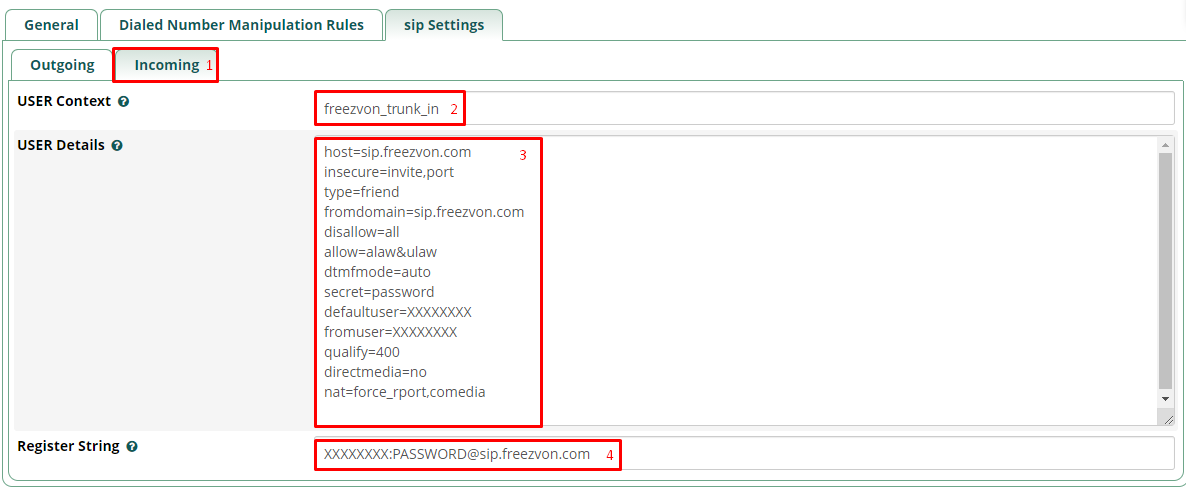
Connect the FreePBX trunk
USER Context - a name of your choosing.
USER Details - the following settings:
host=sip.freezvon.com
insecure=invite,port
type=friend
fromdomain=sip.freezvon.ru
disallow=all
allow=alaw&ulaw
dtmfmode=auto
secret=password
defaultuser=XXXXXXXX
fromuser=XXXXXXXX
qualify=400
directmedia=no
nat=force_rport,comedia
Register String in the form:
XXXXXXXX:
Let’s create an extension for receiving incoming and making outcoming calls
For this, go to Applications -> Extensions -> Quick Create Extension.

FreePBX extension creation
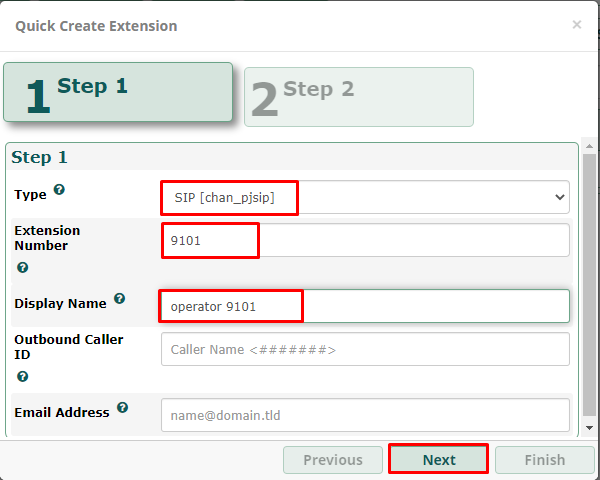
FreePBX extension creation
Fill the following fields:
- Type: SIP (chan_pjsip);
- User extension: a number of your choosing;
- Display name: a name of your choosing.
FreePBX extension creation
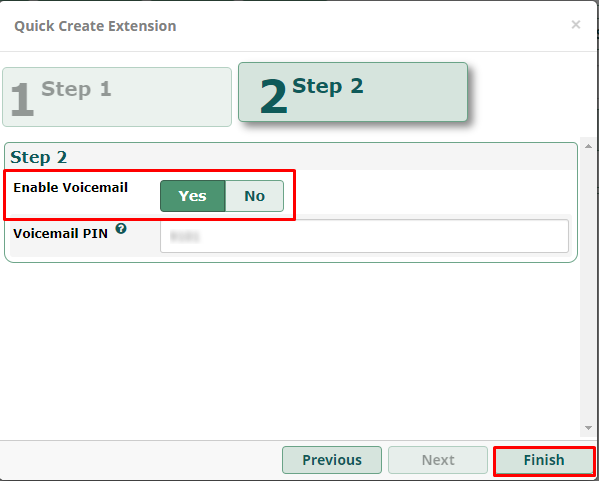
Choose Enable Voicemail: yes or no, after which click Finish.
We already have a configured trunk and an extension at this stage, so the next part is the Outbound Routes configuration.
Adding a route to outbound routes, adding/changing trunk dial patterns
Configuration of processing outgoing calls: Connectivity -> Outbound routes -> Add Outbound Route.

FreePBX Outbound Routing
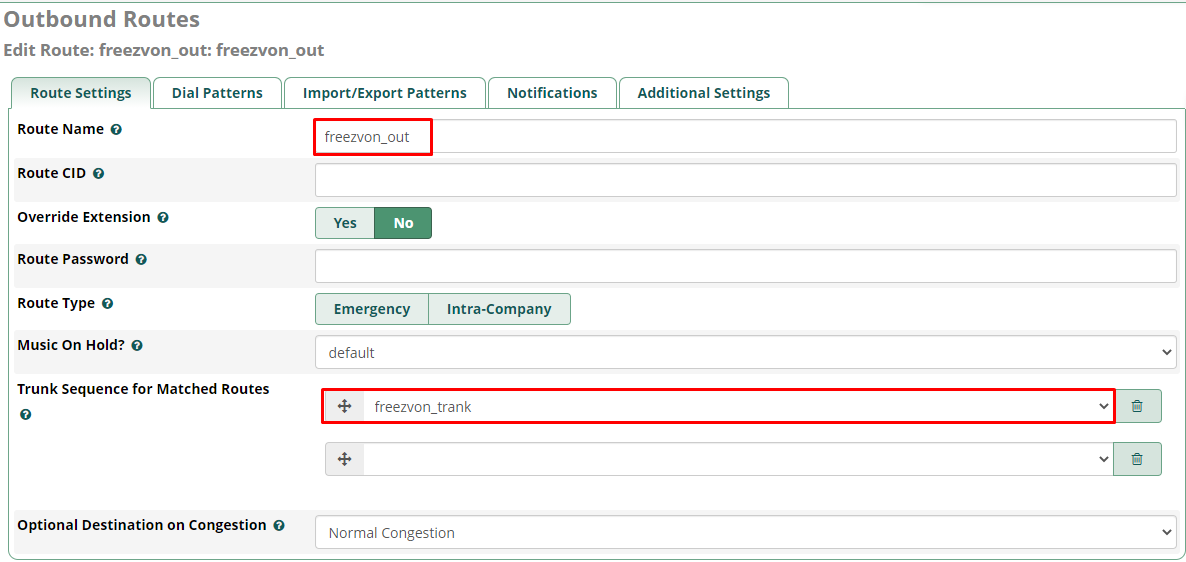
In this section, we assign the route name of our choosing and choose the trunk sequence for matched routes for outgoing calls:
FreePBX Outbound Routing
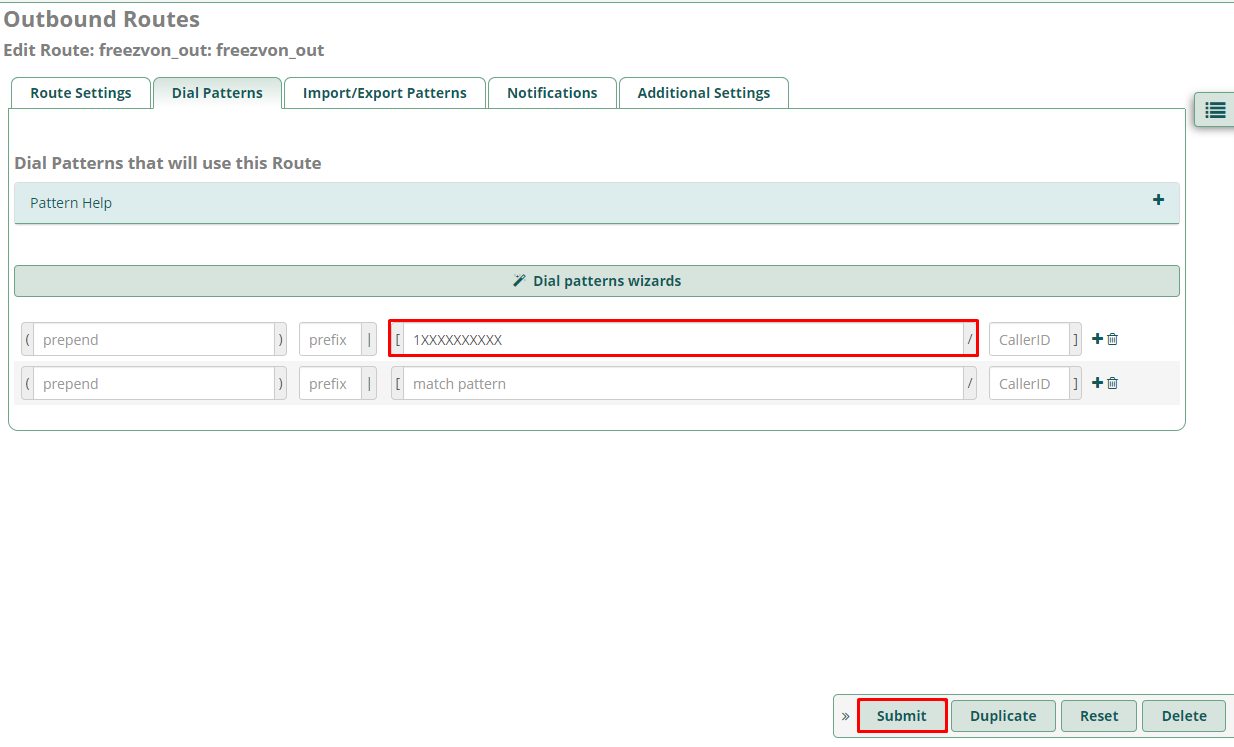
After that, we go to Dial patterns and fill in the required match pattern, for example, for the USA: 1XXXXXXXXXX
FreePBX Outbound Routing
Adding inbound routes
Configuration for incoming calls: Connectivity -> Inbound Routes -> Add Inbound Route..

FreePBX Inbound Routing
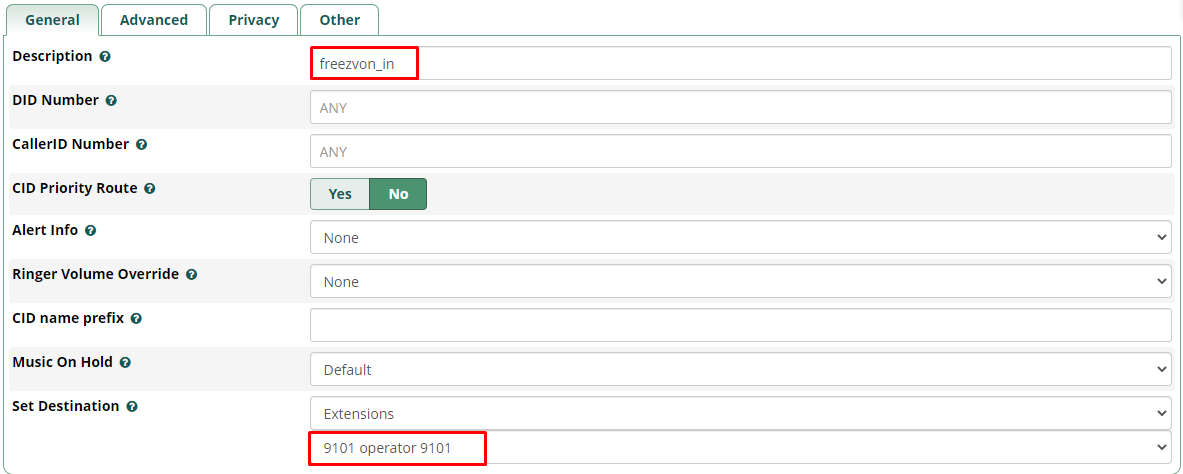
- Description - any name of your choosing, for example, “freezvon_in”.
- Set destination - where your call is going to be forwarded, in our case, to an internal extension 9101.
FreePBX Inbound Routing
This rounds up our initial configuration, and we can make and receive calls through Freezvon trunk.
You can always use Asterisk for making calls via our SIP, but for this you need separate settings depending on your system and requirements. For receiving more details, contact us and solve your problems with unclear moments in virtual telephony services. We provide you with safety, success and favorable quality of our telephony system.

